One-paragraph summary
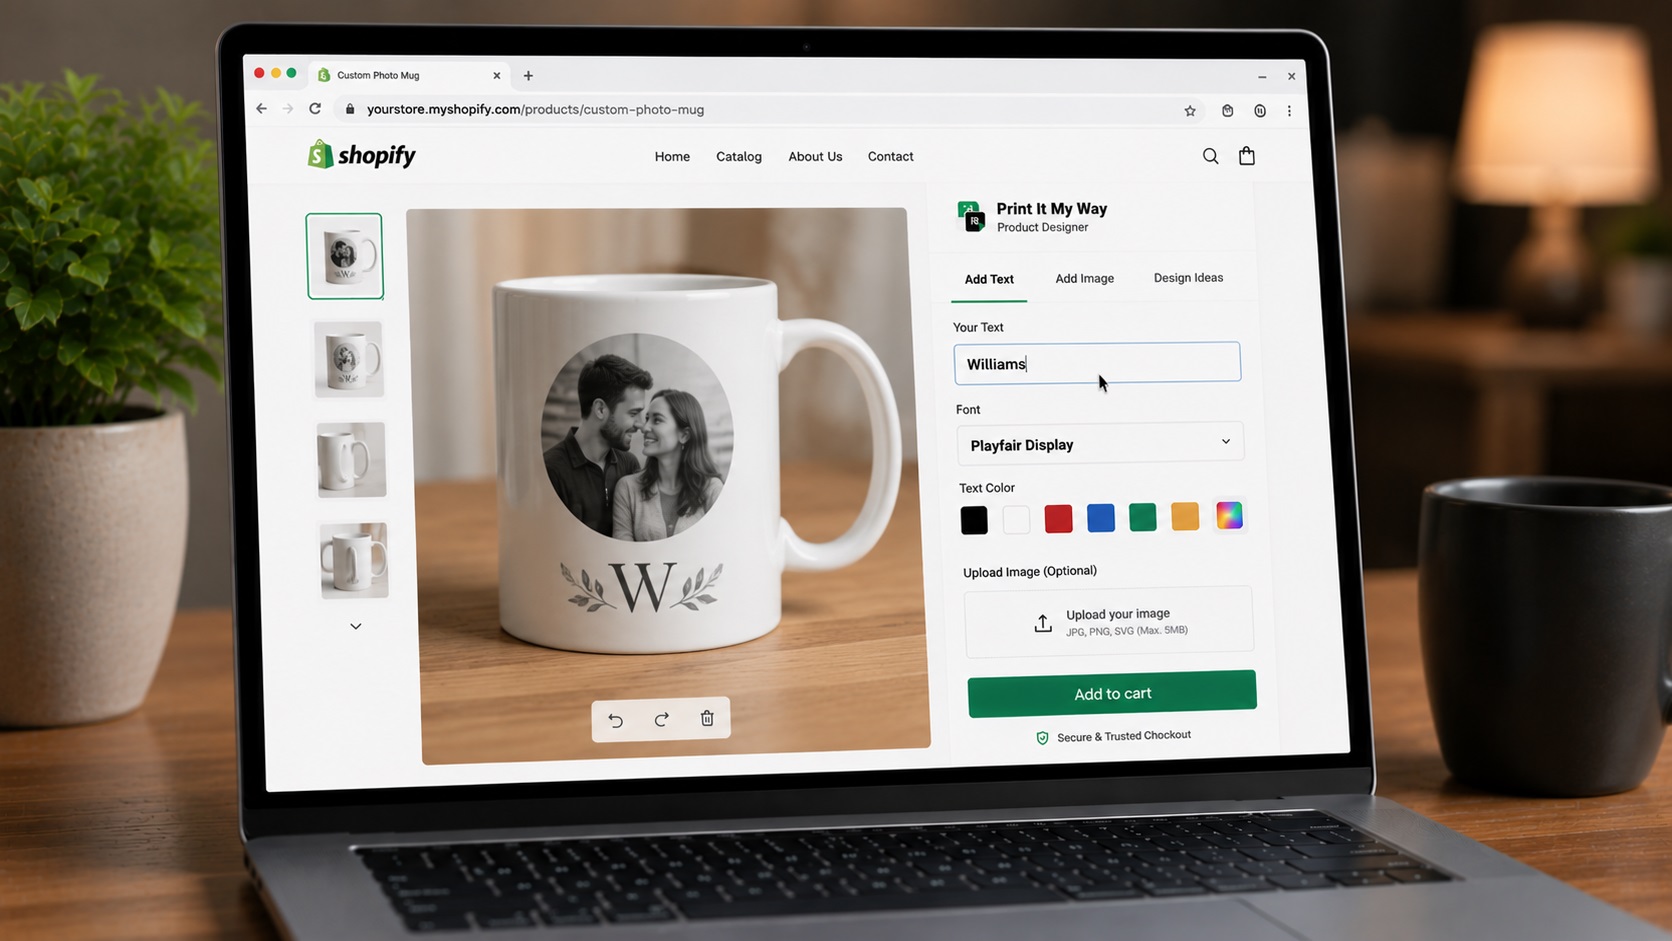
Install Print It My Way (free plan), configure a mug product with full-wrap canvas (9×4 inches print area for an 11oz mug), photo upload field with HEIC support and 300 DPI validation, text field with 35+ fonts and color swatches, and Cart Transform per-design pricing ($14.99 base + $3-5 photo upload + $2 premium font = ~$20-25 typical). The print-ready file is generated automatically as 300 DPI PNG with sRGB color profile and 0.125-inch bleed. The format every major sublimation POD vendor (Printful, Printify, Gelato) accepts. Total setup: 25 minutes for the first product, 1-2 minutes per additional mug variant via bulk-assign.
Step 1: Prep the mug mockup (3 min)
Get a high-resolution mug mockup:
- Resolution: 1200×1200 pixels or higher
- Format: PNG (transparent background optional) or JPG
- Print zone dimensions:
- 11oz mug: 9×4 inches print area = 2,700×1,200 pixels at 300 DPI
- 15oz mug: 9.6×4.1 inches = 2,880×1,230 pixels
- 17oz latte mug: 9.5×4 inches
- Sources: Printful/Printify/Gelato mug templates, or photograph your own mug at 45° angle with the print area clearly visible
Step 2: Install Print It My Way (2 min)
Shopify admin → Apps → Shopify App Store → search "Print It My Way" → Install. Free plan covers this tutorial. No credit card.
Step 3: Create the personalizer (5 min)
- Click Create Personalizer
- Name: "Custom Mug" or descriptive
- Upload the mug mockup as canvas background
- Mark the design zone by dragging a rectangle over the print area on the mockup (9×4 inches for 11oz)
- For two-handed mug design (separate front and back), add a second design zone with the handle between them, but most stores start with a single full-wrap zone
Step 4: Add the text field (3 min)
- Add field → Text Area
- Label: "Your custom text"
- Max characters: 30 (mugs fit longer text than t-shirts because of the cylindrical wrap)
- Font picker: enable, include all 35+ fonts. Recommended for mugs: Dancing Script (script feel for photo mugs), Pacifico (casual), Playfair Display (classic serif), Roboto (modern sans), Lobster (display)
- Color swatches: 6-8 print-friendly colors (black, white, red, navy, gold, silver). Avoid pastels. They wash out on dark mugs.
- Optional: wraparound text effect for designs that curve along the mug shape
Step 5: Add photo upload (5 min)
- Add field → Logo Upload
- Label: "Upload your photo"
- Allowed file types: PNG, JPG, JPEG, WebP, HEIC (iPhone default. Print It My Way auto-converts to JPG server-side)
- Max file size: 10MB
- DPI validation: minimum 150 DPI at the print size (warns customer if upload would result in pixelated print)
- Auto-positioning: center of design zone with proportional sizing
- Allow customer to crop/resize: enable
Mobile camera-roll upload is automatic. Customers tap "Upload photo," their device opens the camera roll, they select. HEIC files convert silently.
Step 6: Configure Cart Transform pricing (3 min)
Open the Pricing tab:
| Component | Price |
|---|---|
| Base 11oz white mug | $14.99 |
| Photo upload fee (when uploaded) | +$3-5 |
| Premium font (Script category) | +$2 |
| Custom message engraving (when filled) | +$3 |
| Typical custom mug total | $20-25 |
Cart Transform calculates fees automatically: fees appear as separate clean cart line items, respect discount codes, flow through to the POD vendor as line item properties. Still choosing that vendor? Compare the best print-on-demand providers for mugs.
Step 7: Configure print-ready file output (2 min)
Open the Production tab:
- Output format: PNG with transparent background
- Resolution: 300 DPI at print dimensions (2,700×1,200 pixels for 11oz, 2,880×1,230 for 15oz)
- Color profile: sRGB (sublimation workflow standard)
- Bleed: 0.125 inches (3mm) for full-wrap designs
- File naming: order number + side identifier (e.g., order-12345-front.png)
The print-ready PNG is generated automatically when a customer places an order, accessible from the Print It My Way orders dashboard. POD vendors (Printful, Printify, Gelato) read the personalization data from Shopify line item properties and generate their own print files from your pre-configured mug template. Print It My Way's PNG output is also available for manual workflows or non-integrated POD vendors.
Step 8: Assign and test (3 min)
- Assign to products: select your mug SKU(s)
- Choose layout: drawer is most common for mug designers (keeps the product image visible while customizing)
- Open the product page in incognito on mobile and desktop
- Design a test mug: upload a sample photo, type "Hello Mom" text, pick Dancing Script font, gold color
- Verify live preview updates as you design
- Add to cart; verify cart shows photo upload fee + premium font surcharge as separate line items
- Create a draft order from Shopify admin; verify the order shows personalization details
- From Print It My Way orders dashboard, download the print-ready PNG and confirm it's 300 DPI sRGB with bleed
Going further
- Multiple mug variants: create one personalizer assigned to all your mug SKUs via collection-level bulk-assign. 11oz, 15oz, color-changing, two-tone all use the same personalizer.
- Template library: create pre-designed templates ("Best Mom Ever", "World's Best Boss") that customers can start from and modify. Increases conversion on first-time custom buyers.
- Two-sided design: configure separate front and back design zones with the handle between. Customers toggle tabs to design each side.
- POD vendor: Printful, Printify, Gelato all integrate via standard line item properties. For India: Printrove (Bengaluru), Vendor (Mumbai). For UK: Prodigi, Inkthreadable.
- Mobile optimization: test the canvas on a real iPhone and Android: touch-targets, photo upload from camera roll, font picker scroll, color swatch tap-size all matter on mobile (60%+ of mug personalization happens on mobile).
Build your mug designer in 25 minutes
Print It My Way's free plan covers your first mug product end-to-end. Free, no credit card, no transaction fees.
Install Print It My Way. Free Read the full mug store guide →Sources & further reading
Primary sources referenced in this article. We link to official platform documentation and standards bodies rather than secondary summaries so you can verify claims directly.